Archive for ‘Winter’

January 8, 2012

Delightful yogurt biscuits

We made these simple and completely amazing biscuits a few weeks ago as an accompaniment to sauteed chard and egg salad made with garlic and yogurt. The egg salad and the biscuits both come from a great new cookbook I was given by friends of ours.

So, from Super Natural Every Day:
Yogurt Biscuits

1 1/4 cups whole wheat flour
1 1/4 cups white flour, plus more for rolling
1 1/2 teaspoons salt
1 tablespoon baking powder
1/2 cup unsalted butter, chilled and cut into tiny cubes
1 1/3 cups greek yogurt (we used ordinary yogurt and it seemed fine)

Preheat the oven to 450 and place an ungreased baking sheet in the oven to preheat as well.

Combine the dry ingredients in a bowl and then cut in the cubes of butter. Mix/cut until the butter is the size of “tiny pebbles.” And the yogurt and mix until just combined. Avoid over mixing, dry patches are okay.

Make the dough into a ball, place on a floured surface, an knead five times. Then press the dough into a square about an in ch thick. Cut the dough square in half and stack the two halves. Do this twice more, flattening, cutting, stacking. Add more flour as needed to prevent sticking.

Press or roll the dough into a 3/4 inch thick rectangle. Don’t let it be any thicker than 3/4 of an inch. cut the dough into 12 equal square biscuits and put them on the preheated baking sheet. Leave at least 1/2 an inch space between them for expansion.

Bake for 15-18 minutes, until the bottoms are golden brown.

We ate them with the egg salad (yogurt instead of mayo and 1 teaspoon of chopped garlic) and chard cooked steamed with cooked onions and garlic. Delightful.

December 11, 2011

Massman Curry (of a sort)

Our version of Massaman Curry, served over rice in a blue handmade bowl.

 
Having once eaten mediocre vegetarian massaman curry in a college dining hall, I (librarian) recently felt inspired to concoct my own version of this dish.  After scouring our rural town’s minimal grocery stores for months, the recommended massaman curry paste finally appeared on the shelf of the natural food store a few weeks ago.  So I looked around the root cellar and the fridge for what vegetables we had to work with.  December isn’t the most inspiring time for vegetable eating, but I came up with sweet potatoes, Asian greens, onions, and garlic.  I swapped the usual tofu  for a can of chickpeas.  I also made the rice with my favorite new method:  crock-pot-as-rice-cooker.  Without further ado, here’s my version of vegetarian soy-free seasonal vegetable massaman curry.

 
4-6 servings (over rice) – Takes about 1hr20 for me to prepare, so you’ll probably be faster.

 
Ingredients

1 large sweet potato or 2 medium-sized ones
1 large onion
3-4 cloves of garlic
1/4 lb of Asian greens (Spinach or any other kind of cooking green will do – but Bok Choi, Mizuna, and the like are particularly great in this recipe; the amount of greens is completely flexible)
1 cup white rice (optional)

 
1 can of chickpeas
1 can of coconut milk (full fat, especially for this recipe)
1/2 can of massaman curry paste (about 2 oz. – see link above for what I used)
1 tablespoon of peanut butter (I like low-fi PB like Teddie but any kind will do)
1 teaspoon of brown sugar (omit if you’re using sweetened PB like Skippy or Jiff)
1/2 teaspoon of dried ground ginger, or chopped fresh ginger
1 teaspoon of toasted sesame oil
1 tablespoon of soy sauce
Generous handful of roasted peanuts (some for cooking, some for topping)
A bit of olive oil (for the pan)
A bit of butter or olive oil (for the crockpot rice-making)

 
Array of sauces and seasonings for the curry

 
Directions

1. Grease the bottom and (lower) sides of your crockpot with some butter or oil.  Put in 1 cup of uncooked white rice, a pinch of salt, and 2 cups of water.  Set your crockpot to high, cover it, and get to work on the rest of the curry.  I found that this dinner was timed nearly perfectly with the rice being done.

 
Rice cooking in crock-pot.

2. Peel and cube the sweet potatoe(s).  Set it/them up to boil for about 15-20 minutes in a saucepan.

 
Sweet potatoes in boiling water

3. While the sweet potatoes are cooking, wash and chop the greens.  Dry them and set aside.

4. While the sweet potatoes are still cooking, chop the garlic and onion.

5. Once the sweet potato cubes are cooked (easily pierced with a fork, but still holding their shape), drain them and put them into a large bowl.

6. In the saucepan you just emptied, put the following:


  • The creamy part of the coconut milk (at the top of the can; just scoop it out with a spoon)
  • 1/2 can of massaman curry paste  (put the rest of the can into a freezer bag and pop in the freezer to store)
  • 1 tablespoon of peanut butter
  • Chopped onions
  • Chopped garlic
  • 1 teaspoon of brown sugar (if you’re using unsweetened/natural PB)
  • 1 tablespoon of soy sauce
  • A handful roasted peanuts
  • 1 teaspoon sesame oil

7. Stir it all around and cook over medium-low heat for a few minutes.

 
8. Once the sauce is combined, add in the rest of the coconut milk.  Cook for about 5-10 minutes until the sauce is heated through.  Be careful not to let it burn – you may have to turn the heat down and stir quite frequently.

9.  Add back the sweet potato chunks and stir until covered in sauce.  Now is a great time to test the seasoning – I added a bit more soy sauce and sesame oil.  You might want to add a bit more curry paste if you like a spicier curry.

10. Add the chickpeas.  Once those are warmed and covered in sauce, check the status of your rice.  If it’s not nearly done, I’d recommend shutting off the heat to the curry.  Leave it covered while you wait for the rice to be done.

11. Check on the rice after about 1hr – 1hr15.  You might want to fluff it up a bit just before it’s finished.

12. When the rice is done, turn the crockpot to warm.  Stir the greens into the curry and cook over low heat until the greens are wilted and incorporated with the curry.

13. Serve your delicious curry over rice!

December 4, 2011

Third Floor Root Cellar

As we move into the long, dark, cold, small-farmers’-market part of the year, we decided it would be worthwhile to again investigate ways to store our veggies and have them keep well.

Since our beloved closet dweller moved out in August, this left us with a large and remarkably cold closet.  After marveling that she slept in there for over nine months, we put the cold, cold, room to work for us:


An inexpensive second-hand bookcase holds our canned tomatoes to keep them cool.


This awesome old basket, lined with brown paper, holds our squash, onions, shallots, and potatoes.


And these beautiful garlic braids, a gift from friends, hang from convenient nails on the walls.


Altogether, it is both nice and dark and cold, and also pretty cute looking.  Those leaf shadows are from the cool branches we lodged up there.  There are lovely little silk leaves we made from some of my fabric scraps and strung onto thread.


The only downside of our root cellar is that we no longer have a guest room, or rather our guestroom and spare blankets, mattress, and pillows, are all beginning to smell heavily of garlic.

October 30, 2011

Crispy Potatoes

Crispy potatoes are simple and delicious.  They’re made in the oven, but the serious amount of oil involved takes these far away from the semi-healthy category of oven fries (and into a category of incredibly delicious).

I started with 2 medium-sized red potatoes, 2 shallots, and 4 cloves of garlic.

garlic clove on wooden cutting board, partly peeled


Shallot sliced thinly, resting on cutting board with knife


Pour some olive oil into the pan and place the thinly-sliced potatoes into a single layer.  Wait about 5 minutes before putting in the oven – this allows the oil to soak into the potatoes a bit more.


Baking time was about 40 minutes in a 375 degree oven, stirring frequently.


Scrambled eggs and chipotle sauce are welcome additions.  Plain old hot sauce is great on these potatoes, as is nearly any sauce you might enjoy dipping french fries into (honey mustard, ketchup and mayo, etc.).

August 8, 2011

Dry beans!

(or at least we hope they will be).

Today, I brought home from the farm a nice big bag of beans.  They were pretty nasty looking and I’ve spared you all a picture of them. Instead, a few brief and descriptive words: shriveled, brown, pink, and white, molded, slightly damp, and crusty.  But, inside these weird looking semi-dry bean pods were these lovely lovely beans.  When you leave shell beans on the bush too long they mature and dry right there on the plant.  Then you just pop the beans out of the shells and let them finish drying.  When they are fully dry, they’re just like other dry beans.  So, we sat down and shelled the whole bag and laid them out in this basket to dry.  The hope is this: if they get enough even and free air circulation and dry well, we’ll have at jar or two or our very own home-dried beans.

They should last well for the winter and won’t take up freezer space.  Of course, the downside is that we will need to get better about actually using the dry beans, but at least we’ll have them.  And it’s worth having some variety for the winter.

Tags:
April 5, 2011

Potato Dill Soup: A Photo Memoir

Chop 1 shallot.


Finely chop 5-6 small carrots. Ours are mostly yellow carrots-hence the color.

Cut one head of garlic into medium chunks.

Cook the shallot, carrots, and garlic in three tablespoons of butter until the shallots start to soften.

Meanwhile, chop 5-6 medium potatoes into small chunks.

Once the shallots are starting to soften, add the potatoes and stir until everything is coated in butter. Cook for 4-5 minutes.

Add 6 cups of veggie stock and a healthy smattering of dried parsley and thyme. Cook until the potatoes are soft.


Add 1 cup milk


and about three tablespoons fresh dill. We froze fresh dill last fall and it has been a life-saver-just wash, dry, and chop it, then pop the dill in a freezer bag and you are good to go.


Now you add the dumplings. We'll post this recipe later, but here's what you do now: make the dumpling/biscuits into balls about an inch in diameter and drop them into the soup so that none are touching. Sprinkle a little more dill on top.


Cover your soup pot and put the whole thing in the oven. Bake at 425 for 15-20 minutes.


You have awesome, delicious, potato dill soup with yummy dumplings. Eat with or without cheese.

March 22, 2011

Portobello-Layered Mashed Potatoes

Whilst constructing a futon (care of our closet-dweller’s generous aunt), we also made this wonderful supper: Portobello-Layered Mashed Potatoes. This recipe was distributed by the folks who run our local farmers’ market and originally written by www.cookinglight.com.

Ingredients:

6 medium German butterball potatoes (or Yukon Golds – but baking potatoes will work, too)
¾ cup milk
At least 1 teaspoon salt
¼ tsp ground nutmeg
1 ½ tablespoons butter
4 shallots (or 2 onions)
5-6 garlic cloves, minced
About 6 portobello mushrooms (appx 3 cups), chopped
2 tablespoons dried basil
At least 1 tablespoon olive oil
¼ cup grated fresh Parmesan cheese
½ teaspoon paprika
A sprinkling of fresh (frozen) parsley


Directions:

Place potatoes in a saucepan, and cover with water; bring to a boil. Reduce heat, and simmer 30 minutes or until tender; drain, reserving 1/2 cup cooking liquid. Mash the potatoes with a fork – keep some texture. Add reserved cooking liquid, milk, 3/4 teaspoon salt, nutmeg, and 1/8 teaspoon pepper, and stir it around until just mixed.

Melt butter in a medium nonstick skillet over medium-high heat. Add onion and garlic, and sauté 2 minutes. Add mushrooms and cook 2 minutes, without stirring. Cook until liquid almost evaporates (about 4 minutes), stirring frequently. Remove from heat, and stir in 1/4 teaspoon salt, 1/8 teaspoon pepper, and basil.

Preheat oven to 375°.

Spread one-third of potato mixture in bottom of an 8-inch square baking dish or 2-quart casserole dish coated with olive oil. Spread half of the mushroom mixture over potato mixture; repeat layers, ending with potato mixture. Sprinkle top with cheese and paprika; drizzle with oil. Bake at 375° for 25 minutes.

We found that it needed extra salt and pepper, along with a bit of butter stirred into our individual portions.

March 20, 2011

Falafel!

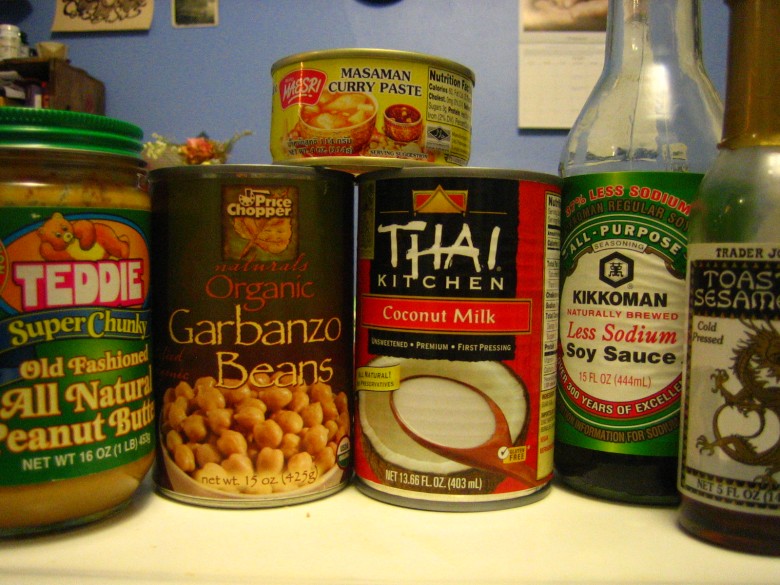
Faced with cans of chickpeas and little fresh food, I opened up one of my favorite cookbooks:  Crescent Dragonwagon’s Passionate Vegetarian.  This was my first vegetarian cookbook and I’ve been finding lots of great recipes in it now that I have consistent access to a real kitchen – it comes highly recommended!  I came across her recipe for baked falafel, which at first glance seemed atrocious.  Then I thought about the time and mess created by frying and decided to give the baked recipe a try.  It was surprisingly tasty.  Not at all the same as regular fried falafel, but worthwhile in its own right.

(Serves 3-4 people with stuff on the side; takes about 15 minutes to prepare, 30 minutes+ waiting, and about 25-30 minutes baking – all in all, little over an hour)

Ingredients:
1/4 cup bulghur (cheap & great for soups; check the bulk bins at a natural foods store or co-op)
1/2 cup water
1 (15-16 ounce) can chickpeas, drained & rinsed
3 decently-sized cloves of garlic (more if you’re a big garlic fan) – coarsley chopped, as they’ll be going in the food processor
1 egg
1/2 teaspoon salt + extra at the end
1/2 teaspoon cumin + extra at the end
1/4 teaspoon black pepper
1/4 teaspoon ground tumeric
1/4 teaspoon ground coriander
Pinch of cayenne
At least 2 tablespoons coarsley chopped parsley (we use about 4 tbsps of frozen parsley for this & it worked fine)
1/3 cup fresh breadcrumbs
(DIY Breadcrumbs:  Toast bread until it’s very dry.  Be careful not to let it burn; if parts burn, cut them off.  Chop it up.)

Directions:
1. Boil about a cup of water.  Pour the water over the bulghur and cover the bowl.  Set aside to soak for at least 20 minutes.  (This is a very imprecise thing, so no need to get fussy with the details.  Bulghur is forgiving, tasty, filling, and cheap – what more could you ask from a grain?)

2. Place half of the chickpeas in a medium-sized bowl and mash slightly with a fork, potato masher, or your hands.  (I used a round ladle to mash it at first, then finished off with my hands.)  They should still have some texture when you’re done.

3. Place the other half of the chickpeas in a food processor with the garlic, egg, salt, cumin, pepper, tumeric, coriander, and cayenne.  Process until smooth, pausing several times to scrape down the sides of the bowl.  Add the parsley and breadcrumbs, then process until it’s smooth.

4. Combine the mixture from the food processor with the mashed chickpeas and the soaked bulghur. Stir it around until it’s evenly mixed.  Taste and add more spices as you like.  Stick the bowl in the fridge for at least 30 minutes, more if you have the time to wait.  This allows the mixture to firm up a bit and will make your life easier vis a vis shaping the falafel.

This waiting period is a great time to whip up some tahini sauce (see below), tdzaki, or whatever you like to eat with falafel.  Plain yogurt works fine!  Also, five minutes before pulling out the batter from the fridge, turn on the oven and preheat to 350F.

5. Remove the falafel mix from the fridge and grease a baking sheet.  Shape the falafel mix into slightly flattened disks.  We made about 25 that were about 1-1/2″ in diameter.  Bake for about 25 minutes (we found that it took about 35, even with our usually hyperactive oven), then flip the falafel over and bake for about 5-10 minutes.  They should be nice and golden brown.

Coconut Tahini Sauce

Thanks to Mark Bittman for the recipe!  Excellent with falafel, or greens, or pretty much anything.

Ingredients:
1/2 cup tahini
Juice of 1 lemon (I used a lemon that had already been squeezed once for tea, and it worked fine.)
2 cloves garlic
1/2 cup coconut milk (about half a can)
1/2 teaspoon ground cumin
Salt and black pepper

Directions:
1. Put the tahini, coconut milk, lemon juice, garlic, and cumin into a food processor.  Add some salt and pepper.  Process until smooth.

2. Taste and add more spices, lemon, coconut, etc. until you like how it tastes.  Serve immediately or cover tightly and refrigerate.

Tags: , ,
March 18, 2011

Nice variation on Greens and Pasta

This week, rushing out to a screening of The Greenhorns film, we threw together this variation on our beloved greens and pasta:

Arugula

Asian greens

1 head of garlic

2 shallots

a dash of balsamic vinegar

On pasta!

Yummy, fast, and not quite the same on Asian greens and pasta

March 15, 2011

Saffron Rice

Faced with minimal veggies and a need for dinner, I looked through our cookbook collection and came across this recipe in Veganomicon.  Since we happen to be lucky enough to have a lot of saffron around–A’s mother works in Afghanistan and brought some back for us–this seemed like a good choice.


Saffron Garlic Rice

1 3/4 cup water

1 veggie bouillon cube (I used 1 can veggie broth-which is actually only 1 3/4 cup of broth, even though the can label says it is 2 cups)

pinch of saffron threads (5-6 threads)

2 tablespoons olive oil

5 cloves minced garlic

1 small yellow onion

1 cup white rice

Pinch of ground coriander (I used a large pinch)

Salt and pepper to taste

1/3 cup sliced toasted almonds


  1. In a medium sauce, boil the water/stock (if you’re using of bouillon dissolve it now).  Turn off the heat, add the saffron and set aside.
  2. Preheat a pot over medium heat.  Saute the garlic in the oil just until it starts to turn golden and softens.  About 3-4 minutes.  Next, add the onion and continue to saute until the onion is translucent, about 5-6 minutes.  Add the rice (uncooked) and stir for a minute.  This helps the rice adsorb the flavors.
  3. Now add the saffron broth water and boil it.  Stir the rice once and turn down heat and cover.  Let simmer 20-25 minutes until the rice is nice and tender and the liquid is gone.
  4. Let the rice stand for 10 minutes off the heat, then fluff it up with a fork and serve.


We ate this with black beans and “Spanish” seasonings and hot sauce (oregano, cumin, Spanish paprika, lots of black pepper)